
User guide
Everything you need to use Glyco on your phone or in your browser. Features are the same on iPhone, Android and the web.
Creating an account and signing in
Open the app or app.glycosmartlog.app and choose how to sign up.
- Tap Create an account and enter your name, email and password, or use Sign in with Apple or Sign in with Google.
- If you sign up with email, confirm your address with the link you receive.
- The first time you sign in, read and accept the Terms and the consent to process health data.
- In Settings choose your unit (mg/dL or mmol/L), language and theme.
💡 Forgot your password? On the sign-in screen tap Forgot password and follow the link you receive by email.
The diary
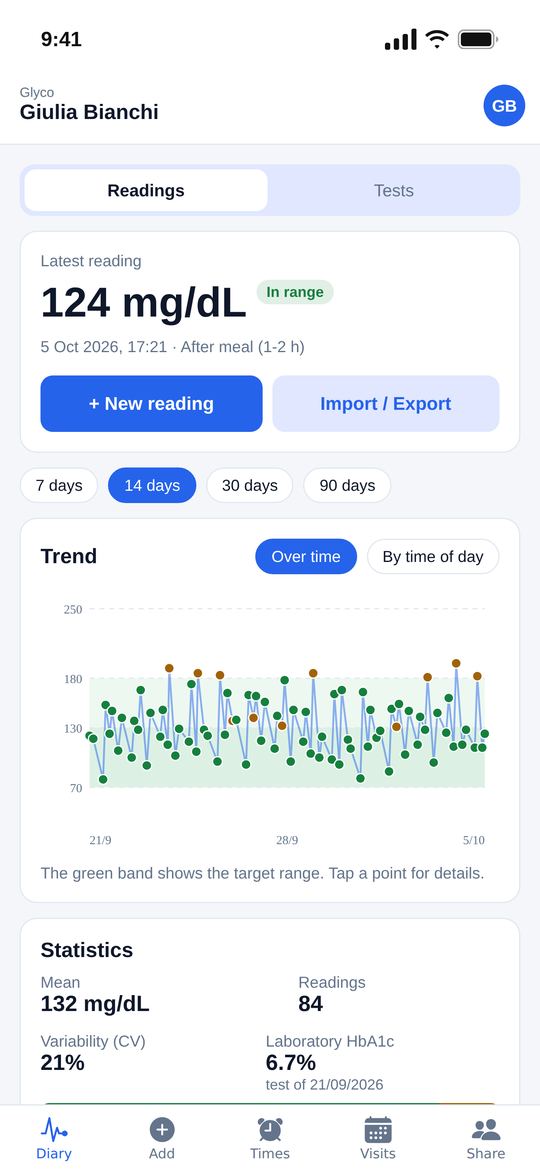
The Diary tab shows your latest reading, the trend chart (over time or by time of day) and statistics for the selected period: 7, 14, 30 or 90 days.
The green band on the chart is your target range. The “below / in range / above” labels only show where a value lies relative to that range.
Below, the list is grouped by day, with the Readings tab (glucose and insulin) and the Records tab (meals, medication, activity, weight, blood pressure, ketones). Tap an item to edit or delete it.
Logging a reading
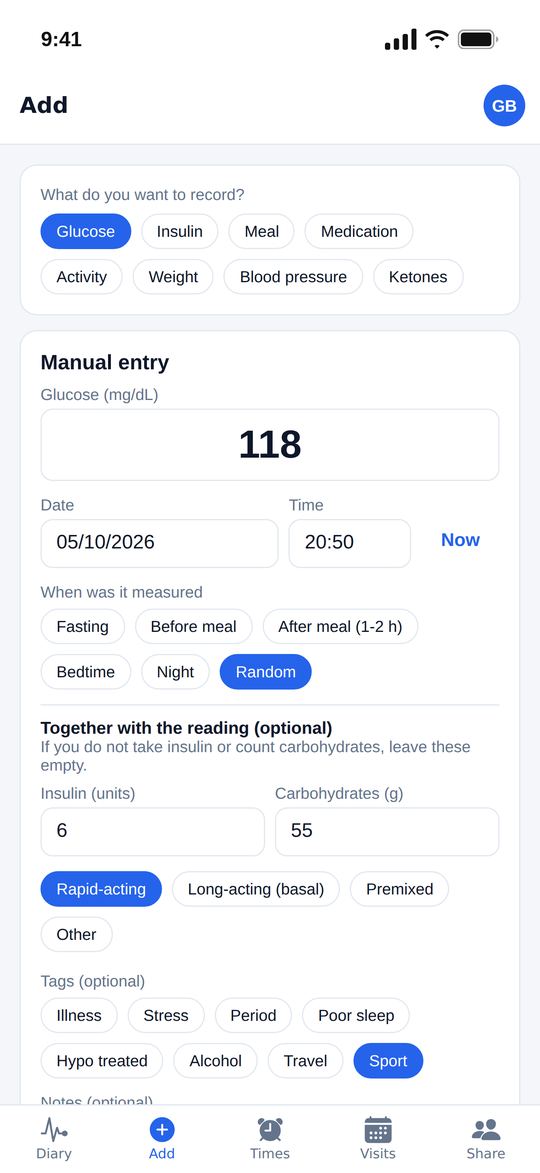
- Tap Add and choose Glucose.
- Enter the value, date and time (tap Now for the current time) and when it was measured: fasting, before or after a meal, bedtime, night or random.
- Optional: add insulin, carbs, quick tags (illness, stress, period, poor sleep, treated hypo, alcohol, travel, sport) and a note.
- Tap Save reading.
💡 From a photo: on the same screen you can take a picture of your meter’s display or of a paper diary page. Glyco reads the values and asks you to confirm them before saving.
Insulin, meals and other data
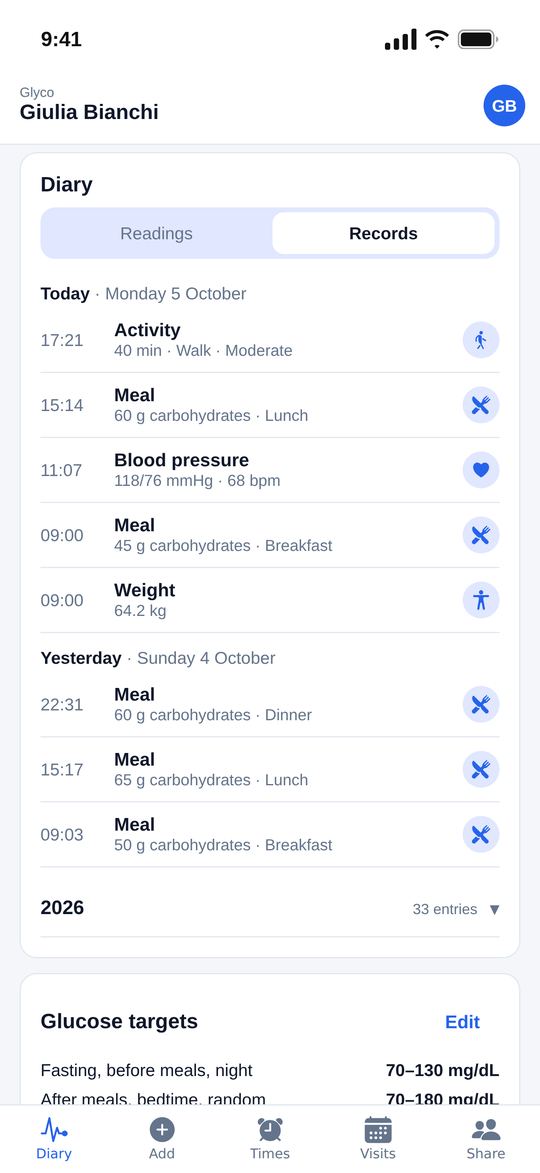
In Add you can also log, on their own or with a reading:
- Insulin: units, type (rapid-acting, basal, premixed) and name.
- Meal: carbs and description.
- Medication: name and dose.
- Physical activity: type, duration and intensity.
- Weight, blood pressure (with heart rate) and ketones (blood or urine).
Importing data (FreeStyle Libre, Excel, CSV)
From the menu at the top right, open Import / Export.
- FreeStyle Libre: sign in to libreview.com, download your data from the glucose history page (.csv file) and choose it in Glyco. Glucose, insulin, carbs and ketones are recognised automatically.
- Excel or CSV: the file needs a header row with at least the Date (or Date and time) and Glucose (or Value) columns. Optional: Time, Unit, Context, Notes.
- Check the preview: values already in your diary are recognised and not duplicated.
Exporting and bringing data to appointments
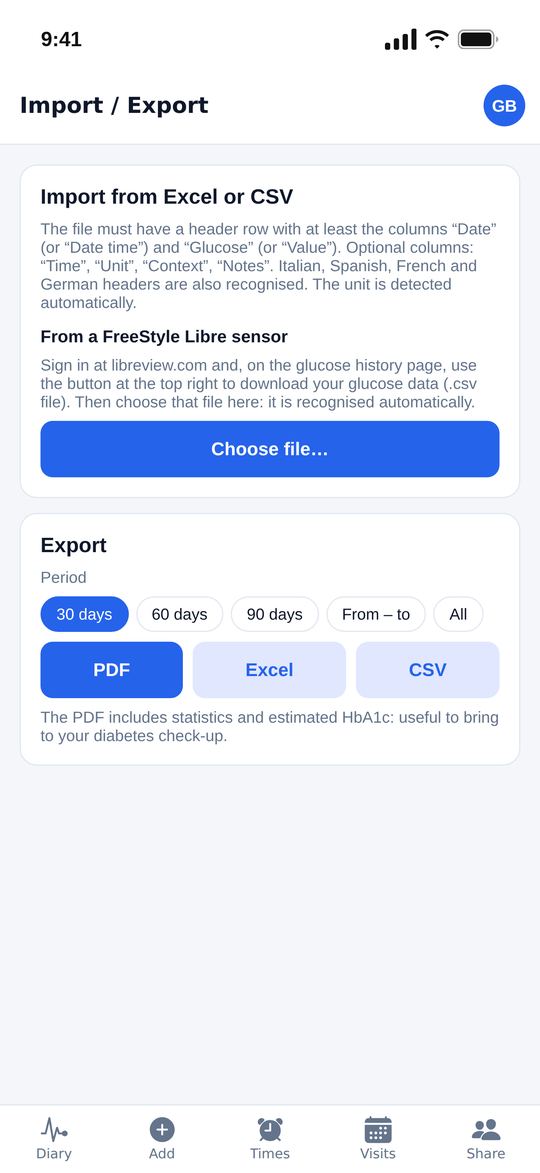
In Import / Export choose the period (30, 60, 90 days, a date range or everything) and the format:
- PDF: a report with charts, statistics and the list of readings, to print or send to your doctor.
- Excel and CSV: all your data, to keep or analyse.
Appointments and lab results
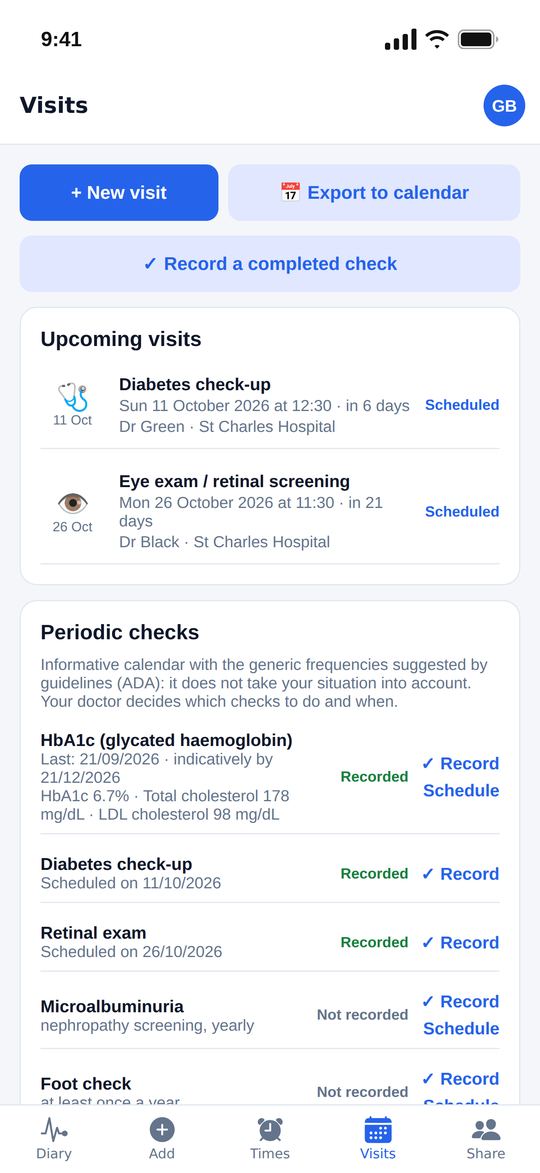
- In the Visits tab tap New visit: type (diabetes check-up, blood tests, eye exam, cardiology…), date, doctor, place, preparation and reminders.
- After the visit, record the outcome and results (for example HbA1c, cholesterol, blood pressure, retinal exam).
- In the diary, the Tests tab shows results over time and compares them with previous ones.
- Periodic checks shows the generic frequencies from guidelines: it is an informative calendar, your doctor decides which checks you need.
💡 With Export to calendar you can add appointments to your phone’s calendar or to Google/Outlook.
Reminders and notifications
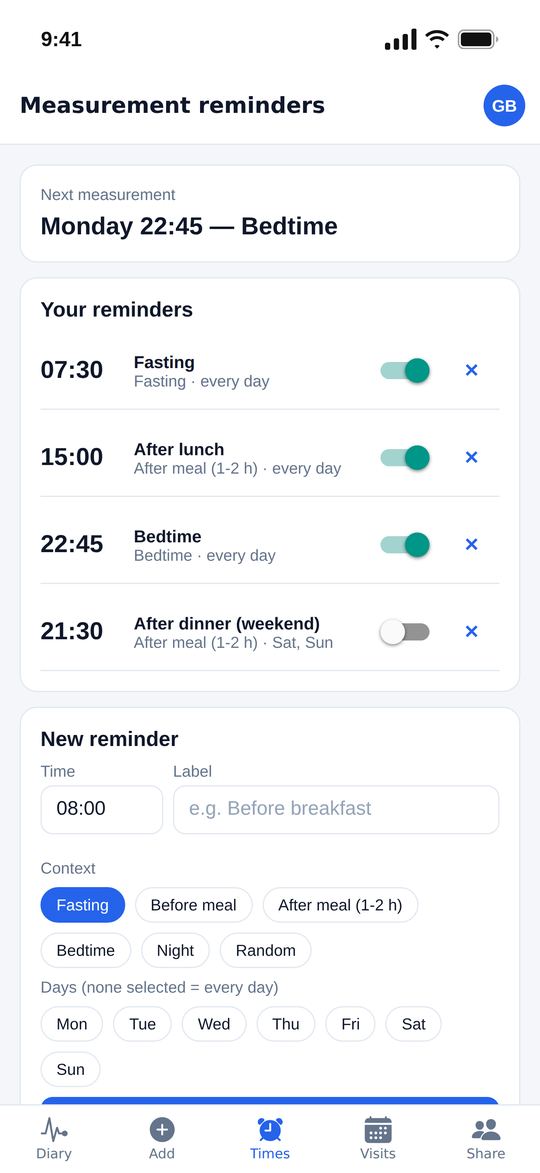
In the Times tab create reading reminders: time, label, context and days of the week. Turn them on or off with one tap.
Notifications arrive on the iPhone and Android apps: your phone asks for permission with the first reminder. On the web you can set the times, which sync to your devices.
Sharing your diary
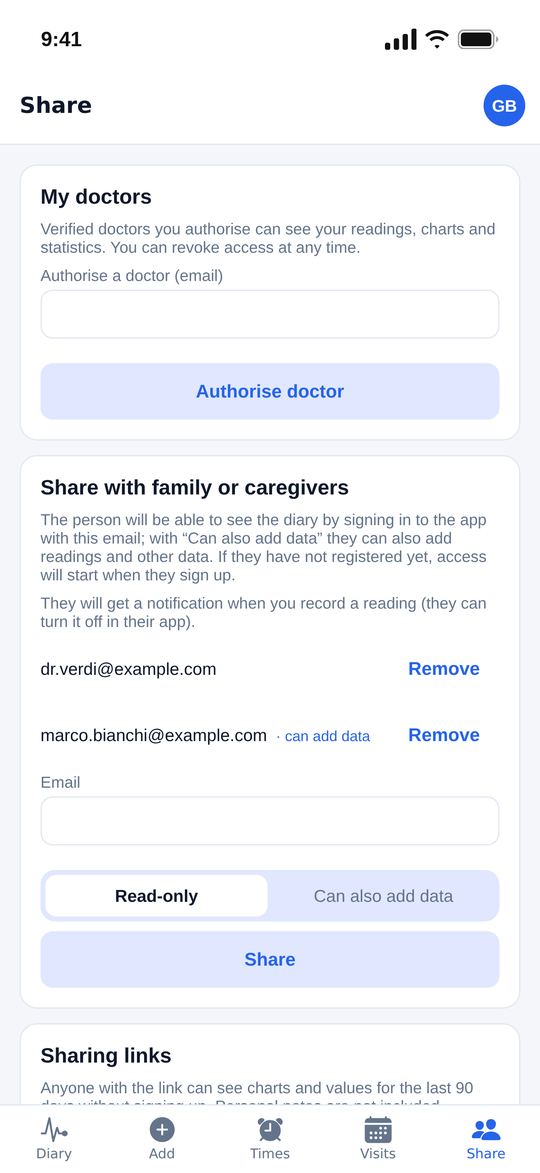
In the Share tab choose who to share your data with. You can revoke any access at any time.
- Doctor: enter the email of a doctor verified on Glyco. They will see readings, charts, statistics and lab results.
- Family or caregivers: enter their email and choose Read-only or Can also add data. If they have not signed up yet, access starts when they create their account.
- Sharing link: create a time-limited link (e.g. 30 days) that shows charts and values from the last 90 days, without notes, to anyone who opens it in a browser.
💡 People who follow your diary can get a notification when you log a reading. Everyone can turn these alerts on or off for each diary.
Family: managing several diaries
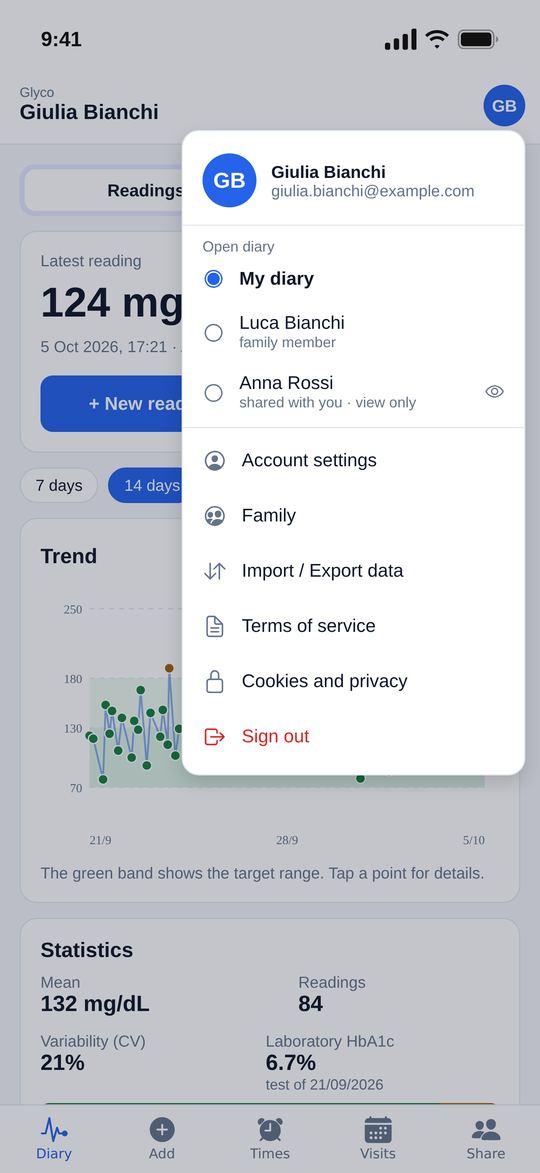
From the menu at the top right open Family to create a diary for someone without an account, for example your child. You fill it in from your account and can share it with the other parent.
To switch diaries, tap your initial at the top right and choose a diary: yours, those of family members you manage and those shared with you (read-only ones open in view-only mode).
Gestational mode
For diabetes in pregnancy, set your estimated due date in Settings. The diary shows the week of pregnancy and you can add suggested reading reminders.
Target ranges are set by your doctor: you can enter them yourself or let the doctor you share your diary with set them.
Using Glyco offline
Glyco works offline too: you can view recent data and log new readings and entries. When you are back online, everything syncs automatically. An icon at the top shows data waiting to be sent.
For doctors
Doctors sign up like any other user and request verification from Settings, uploading their medical registration certificate and an ID document and confirming their certified email (PEC, for Italian doctors).
Once verified, the Patients section shows the diaries of patients who authorised them, with charts, statistics, appointments and lab results, and they can set their target ranges.
Account, privacy and deletion
In Settings you can edit your profile, optional clinical data, units and targets. Your data is visible only to you and to the people you authorise.
To delete everything open Settings → Delete account and data: your account and all linked data, including the diaries of family members you manage, are deleted immediately. You can export them as PDF, Excel or CSV first.
Need help?
Didn’t find the answer? Write to us at support@glycosmartlog.app